02 July 2013
19 June 2013
Blender and Rigged Mesh
I finally made a rigged mesh avatar using Blender 2.6.
I'm adding some short notes here to make it easier in the future.
I'm adding some short notes here to make it easier in the future.
- Make your model. Make sure to place vertices near the joints. Save file.
- Open up avatar.blend in Blender. Copy the bones layer into your model file.
- Align the model (and the bones if you're changing their lengths) so it and the bones looks reasonable. Parent (control-P) the bones and the model, and use the "envelopes" option.
- Select a bit of bone, and go into Pose mode (object, edit, etc)
- Select the mesh and go into Weight mode. Blue is no effect, Red is full effect. (object data - the little triangle tab - shows which bone you're on) Paint to your heart's content. Save.
- If you modded the bones: Select the bones. Object | Apply | Rotation and Scale
- Select the mesh and bones.
- Export to collada as rigged SL object. If you changed the bones from default, or sized the bones up or down, make sure Deform Bones is checked.
- Upload in SL as a rigged mesh. Check the boxes for skin weights and joint positions, and adjust the height offset as needed.
03 April 2013
Busy and on the Bench

One of the downsides to working with mesh in SL is not being "in" SL while I work. Blender is definitely a two hands sort of application, and it needs a lot of screen real estate. No bings of people wanting a chat, no group windows exploding with drama. Scripting can be lone work too, especially if I take it offline.
Fantasy Fair is starting up again soon, and I'm kind of bemused to realize it was back in '09 when I was in it. It's been a long time since I've made things that weren't either just for me and friends, or for a contracted client.
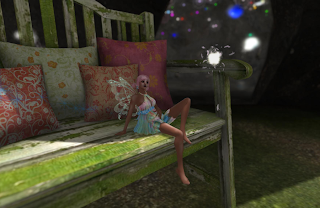
I took an afternoon earlier this week and redid a chunk of my mainland space. I swapped out the cave skybox for a floating island with a couple grassy surfaces (and a cave inside!) As you can see, I bought a (4 LI!) bench for it.
27 February 2013
Subscribe to:
Comments (Atom)
